View our Main Site »
Showing posts with label recipes. Show all posts

Friday, September 15, 2017

New Beer Friday, Sam's Famous Kapusta Edition (Sept 15)

Customers enjoy kapusta
Preamble by Steve Siciliano

It's tradition here at Siciliano's to treat our customers to German wieners and draft root beer on the Saturdays of our annual, week-long Customer Appreciation sales. There are many who would agree that nothing goes better with German wieners than homemade kapusta and for many years the kapusta that we served as a garnish for the locally sourced dogs was made by my late father Sam Siciliano.

Kapusta is the Polish word for cabbage and my father's version of this traditional Polish dish garnered universal praise. I'd like to think he came up with the kapusta recipe on his own but the more likely scenario was that he sweet-talked some lady who cooked in one of the Polish halls here in town into sharing it with him. I do know that he continually tweaked the recipe over the years and that his version of kapusta was decidedly unique.

Sam has been gone four years and there hasn’t been kapusta at our Customer Appreciation Days since his passing. This year my wife Barb and I decided it was time we revived that part of the tradition.

When I got home from the store last Friday Barb was already in the kitchen chopping onions and celery. I grabbed a big knife and a big wooden cutting board and began shredding the three big heads of fresh cabbage. I thought of my dad while I chopped. I could see him shredding the cabbage at the table in his small kitchen. I imagined him getting up every so often from his naps to stir and taste and tweak the seasonings. I remembered all the times I lugged the big roasting pan to my truck and how he would smile when I asked him how much of the kapusta he had eaten.

Barb and I got a lot of compliments for the kapusta last Saturday and more than a few customers asked if they could have the recipe. We made sure we told them whose recipe it was and that we were sure that Sam would would have been more than happy to share it with them. Here it is.

SAM SICILIANO'S HOMEMADE KAPUSTA

    • 2 lbs sauerkraut, drained
    • ¾ head of cabbage, shredded
    • 1 ½ cup onion, diced
    • 1 ½ cup celery, diced
    • 2 bay leaves
    • 2 garlic cloves, minced
    • 2 15-oz cans chicken broth
    • pork steak, pork roast or spare ribs
    • 3 tsp brown sugar
    • salt and pepper to taste

Directions

    • Saute onions, celery, garlic and pork in oil
    • Add drained sauerkraut
    • Add chicken broth, simmer 15 minutes
    • Add bay leaves, salt and pepper
    • Add shredded cabbage, simmer 1 hour
    • Add additional brown sugar to taste
    • Serve to friends with beer, brats, wieners, sausages and/or kielbasa

New and Returning Beer

  • Arcadia Jaw-Jacker, $1.79/12oz - "This spiced amber ale is our celebration of the arrival of Autumn. Brewed with cinnamon, all-spice, and nutmeg (a riff on Grandma Davies’ pumpkin pie recipe), and additions of Caramel and Crystal malt for balanced flavor, drinkability, and a brilliant orange-amber color, despite the absence of pumpkin in the recipe. A refreshingly spicy, season brew" (source).
  • Bell's Expedition Stout, $3.09/12oz - "One of the earliest examples of Russian Imperial Stouts in the United States, Expedition Stout offers immensely complex flavors crafted specifically with aging in mind. A huge malt body is matched with a heady blend of chocolate, dark fruit and other aromas. The flavors will slowly meld and grow in depth as the beer ages in your cellar" (source).
  • Bell's Roundhouse, $1.89/12oz - "Substantial amounts of late-kettle hop additions and dry-hopping yields a heady blend of fruity aromas of pineapple, peach and citrus. Those aromas continue into a crisply bitter hop presence across the tongue, but the judicious use of toasted and caramel specialty malts prevents the hop intensity from overwhelming the palate. Locally sourced Michigan honey creates a smooth, dry finish that pulls everything together" (source).
  • Port Brewing Mongo, $7.19/22oz - "Our flagship Double IPA, Mongo harnesses the flavor of Columbus, Cascade, Centennial, and Simcoe hops. Massive resinous aroma leads to citrus notes with a piney bitterness on the finish" (source).
  • Port Brewing Whipeout, $4.79/22oz - "Brewed to celebrate anyone and everyone who has ever paddled out into the best wave of the day, only to blow it and Wipeout in a blaze of glory" (source).
  • Boulevard Unfiltered Wheat, $1.69/12oz - "Boulevard Unfiltered Wheat Beer is a lively, refreshing ale with a natural citrusy flavor and distinctive cloudy appearance. This easy drinking American-style wheat beer has become our most popular offering, and the best-selling craft beer in the Midwest" (source).
  • Czechvar Dark, $1.69/12oz - "Czechvar uses the noble Saaz hop variety, which contributes spicy and herbal aromas and flavours. Deep brown in appearance, with a thick, long-lasting head. Malt aromas are in the foreground, with notes of toasted nut, molasses, mocha and a hint of smoke. On the palate, it is full-bodied, with chocolate and coffee flavours" (source).
  • Czechvar, $1.69/12oz - "The result of our careful selection of ingredients, our traditional brewing process and the care we take during production is Czechvar’s irreplaceable and inimitable flavour" (source).
  • Lost Abbey Lost and Found, $8.39/750ml - "Lost and Found- Modeled after the great Trappist and Monastic beers that inspired the founding of our brewery. A richly deep garnet colored ale created from a blend of Domestic and imported malts. As part of our commitment to interesting brewing endeavors, Chef Vince created a special raisin puree for this beer. Malts, raisins and a fantastic yeast strain working in harmony produce a beer of amazing complexity and depth. Available in 750ml bottles and on draft at select inspired locations" (source).
  • Lost Abbey Devotion, $8.39/750ml - "A lighter bodied beer that immediately makes an initial hop impression followed by a brief thinning layer of malt which is swallowed in the driest finish by a driven hop expression" (source).
  • Southern Tier Rum Barrel Aged Pumking, $15.99/22oz - "rum barrel aged imperial pumpkin ale with notes of pumpkin pie spice" (source).
  • Beards Deez Nutz, $2.89/12oz - "Smooth and chewy with nutty caramel flavors and a medium body" (source).
  • High Water Campfire Stout, $10.19/22oz - "Stout brewed with graham crackers, molasses with natural flavor added. Campfire Stout evokes fond memories of wilderness and camping adventures. Notes of chocolate and graham cracker topped with a hint of marshmallow will leave you wanting s’more. Like any campfire experience, this beer is best shared with a warm circle of family and friends" (source).
  • High Water Aphotic Imperial Porter with Coffee, $10.19/12oz - "Formally defined as the depths in water beyond which less than one percent of sunlight penetrates. Aphotic is a beer with a very dark side. Just one sip and you will understand the true depths of its darkness as the deep, luxurious layers of malt rich-ness tantalize and tease your taste buds. Cold pressed coffee adds a slight citrusy, earthy flavor with floral aromas" (source).
  • High Water Breakfast Sour, $15.39/500ml - "Central Valley Breakfast Sour is aged in used wine barrels for one year with the finest fruit from the Central Valley of California. It is a bright and beautiful golden sour with an abundance of fresh pressed white grapefruit juice. The tart beginnings are rounded by the lusciousness from the pears and the delicate, exotic perfume of the lychee fruit. A pleasurable ale to enjoy with brunch or anytime of the day" (source).
  • Stillwater Shoegaze, $2.89/16oz - "Distorted farmhouse pale ale" (source).
  • Stillwater/Dugges Tropical Punch, $4.99/12oz - "Tropic Punch Ale is a joint effort with nomadic brewer Brian Strumke of Stillwater Artisanal. We brewed this sour ale with lactobacillus and let it ferment with plentiful mango, passion fruit and peach" (source).
  • Stillwater/Dugges Cocoa Cacao, $7.19/12oz - "In collaborating with Stillwater Artisanal we always focus on distinct, clear, punchy flavors. This beer is no exception. Inspired by everyone’s favorite candy, this is a chocolate bar in a bottle" (source).
  • Evil Twin/Jackie O's You're in the Jungle Baby, $4.99/12oz - "Imperial stout with Pasilla chili, honey, tangerine peel and cocoa nibs added" (source).

Video of the Week | Jaw-Jacker


Now available at Siciliano's.

Cheers!

Wednesday, February 22, 2017

February Brew of Month: Matt's Tropical Fruit Saison

By Matt Ross

This brew of the month is a special two-part edition. In this recipe, I combined two of my favorite things: big Brett character and bold fruity hops. Be forewarned that Brett will nest in most of your plastic equipment and is notorious for cross contamination. Keep your equipment clean and separate unless you really like Brettanomyces.

To get the ball rolling, this was initially an eleven-gallon batch. I used a base of pilsner malt with smaller additions of carahell and aromatic. These malts contribute significant complexity and backbone without becoming overwhelming. I wanted to keep it simple with the grain as to not take away from the focus of the recipe.

The hop schedule on this beer is also simple but quite aggressive for the style. While it comes in between 30 and 40 IBUs, the IBUs are more geared towards flavor and aroma. For all-grain, I used half an ounce of Columbus at 60 minutes, half an ounce of Centennial at 30 and one ounce each of Mosaic and Nelson Sauvin at 10 minutes. This combination proved to be very efficient at giving a big hoppy punch. If you are doing a half-size boil for extract and topping up with water at the end, be sure to double the 60 and 30 minute additions due to the lowered hop utilization from the highly-concentrated wort.

Experimenting with homebrew is still one of my favorite things. I made 11 gallons of wort so this beer could be split into 2 fermenters with 5.5 gallons in each. Both were fermented warm (around 75 degrees) using the Wyeast’s 3711 French Saison and after a week transferred into glass carboys. Each carboy received a dose of a different strain of Brettanomyces and sat for just shy of 3 months. Generally, Brett works slower than brewer’s yeast which is why I did the long conditioning in secondary. I selected bruxellensis and claussenii.

To keep it short and sweet, Brett is the weird second cousin twice removed from brewer’s yeast. It ferments sugars but at a slower pace, will even consume long chain sugars that brewer’s yeast can't, and will work well under different environments. As mentioned before, it is notoriously hard to kill. After the world ends it will be full of cockroaches, Twinkies and Brett.

This beer turned out very dry. The French saison yeast does a great job of attenuating by itself but the Brett made these beers bone dry. The bruxellensis produced more classic Brett flavors like barnyard and funk while which made for a nice contrast with the hops. Overall it was very refreshing and fruity. The claussenii created a very different beer. The hops and Brett worked together swimmingly to create a perfect storm of over ripened tropical fruit with a big citrus kick.

This was a great recipe if you have open carboys and patience. This brew of the month is out of place for February but you can thank me when you are grilling on the porch in June with a bright hoppy Brett-saison.

As always I love to encourage people to put their own twists on recipes. Don’t want to pay for expensive yeast twice? Try the WLP644 Sachromyces “Bruxellensis” Trois or one of our great new Omega products like the C2C American Farmhouse. Make it your own. Brew on.

11-Gallon Extract Version ($79.36)

    • 18lbs Pilsen Light LME
    • 1lb cara hell
    • .75lb aromatic
    • 1oz Columbus
    • 1oz Centennial
    • 1oz Mosiac
    • 1oz Nelson Sauvin
    • Wyeast 3711 French Saison
    • WLP645/WLP650

11-Gallon All-grain ($57.13)

    • 21lbs Pilsner Malt
    • 1lb Carahell
    • .75lb aromatic
    • 1oz Columbus
    • 1oz Centennial
    • 1oz Mosiac
    • 1oz Nelson Sauvin
    • Wyeast 3711 French Saison
    • WLP645/WLP650
The staff at Siciliano's is always eager to answer your homebrewing questions. Stop by for help developing custom-made recipes like this one!

Tuesday, December 20, 2016

December Brew of the Month: Mark's Ginger Cream Ale

By Mark Iacopelli

The holidays can be a very expensive time of year, but for a homebrewer the beer must flow on. My goal with this recipe was to create something that had a subtle twist on a crowd pleaser style. So I felt like an American Cream Ale would be a simple clean beer for your family members that are not yet initiated to craft beer. I then add a little bit of ginger root to add a zesty and savory element that would pair with most any holiday dish. This is also a budget friendly brew.

The resulting beer is straw in color with almost perfect clarity. The head is snow white with medium retention. On the nose the ginger shines through initially with an almost citrus quality. The corn balances the citrus aroma to round things out. Up front the flavor is bright and savory with a touch of spice both derived from the ginger and from target hops. In the finish it is predominantly a sweet earthiness from maize, however, it still manages to finish dry. The dry finish is a key part to making this beer crisp and sessionable despite being at the peak ABV for the style.

Overall, I am very pleased with this beer, and it is likely going to be a recipe that will stay on rotation in my brewhouse. The base beer recipe will work well with whatever extra flavoring you wish or on its own if ginger is not your thing. Ginger is found so frequently in preparing a huge range of dishes and it is because of that and this beer's crispness that I think it would pair well with almost any food dish.

Vital Statistics

    • OG: 1.048
    • FG: 1.005
    • IBUs: 20.1
    • ABV: 5.6%
    • SRM: 2.8
    • Efficiency: 72% (all grain only)

All Grain ($12.35/5-Gallon)

    • 5 lbs Avangard Pils
    • 1 lb Corn Sugar
    • 1.25 lbs Flaked Maize
    • 1 lb Pilot 6 Row
    • .5 lbs Rice Hulls
    • .25 oz Nugget (60 mins)
    • 1 oz Ginger Root (12 mins)
    • .5 oz UK Target (10 mins)
    • .5 oz UK Target (4 day dry hop)
    • 1 pkg Safale American US-05

Extract w/ Steeping Grains ($22.80/5-Gallon)

    • 6 lbs Light Liquid Extract
    • 1 lb Corn Sugar
    • 1 lb Flaked Maize
    • .25 oz Nugget (60 mins)
    • 1 oz Ginger Root (12 mins)
    • .5 oz UK Target (10 mins)
    • .5 oz UK Target (4 day dry hop)
    • 1 pkg Safale American US-05
Water additions base on Grand Rapids city water (optional): 4 ml 88% lactic acid (mash pH),15 g gypsum (mash pH, hop flavor)

Tuesday, September 13, 2016

September Brew of the Month: Farmhouse IPA

Cashmere hops
By Max Spencer

Late August and early September is harvest season for many crops, including one of our favorites as brewers: hops! Harvest season always puts me in the mind of agriculture — the smell of a farmyard, produce fresh out of the fields and long hours of hard manual labor.

Recently I found myself in the possession of fresh wet hops thanks to one of our regular customers and felt that I should make a special beer with them. I decided to make a wet-hopped farmhouse IPA inspired by agriculture and driven by opportunity.

The phrase “farmhouse” refers to historical beers, typically some kind of pale ale, brewed at farms for the consumption of farmhands during the farming seasons. A well-known example of a modern beer inspired by this tradition is the Saison.

Saisons (“seasons” in French) are derived from ales brewed in Wallonia, Belgium. In this region farmhands were entitled up to five liters of beer each workday (the average ABV would have been around 3-3.5%, so farming wasn’t necessarily an all-day rager). I utilized Saison yeasts in my take on a wet-hopped IPA to add the “farmhouse” aspect that I was looking for in honor of harvest season and the farmhands that are working hard for our benefit.

Not everyone will have access to fresh hops, so in the recipes I added hop schedules that use pellet hops. If you do have fresh hops, scroll down to the bottom for a wet-hop schedule.

ALL GRAIN

    • 8.5 lbs. Pale malt
    • 4 lbs. Maris Otter
    • 1 lbs. Carahell
    • 1 lbs. Golden naked oats
    • 0.5 oz. Magnum @ 60 min
    • 1 oz. Mosaic @ 30 min
    • 1 oz. Mosaic @ 15 min
    • 1 oz. Mosaic @ flameout
    • 1 oz. Motueka @ flameout
    • OG: 1.065
    • Bitterness: 61.5 IBUs
    • SRM: 6.2

EXTRACT (Boil volume: 3.85 gallons)

    • 8 lbs. Pilsner liquid extract
    • 2 lbs. Wheat liquid extract
    • 1 lbs. Carahell
    • 1 oz. Magnum @ 60 min
    • 1 oz. Mosaic @ 30 min
    • 1 oz. Mosaic @ 15 min
    • 1 oz. Mosaic @ flameout
    • 1 oz. Motueka @ flameout
    • OG: 1.064
    • Bitterness: 59.9 IBUS
    • SRM: 6.9

YEAST

With yeast, you have all kinds of options! I wanted to do something fun with my IPA, so I used two yeasts: Wyeast 3724 Belgian Saison and White Labs 644 Saccharomyces “brux-like” trois. The Belgian Saison is known for producing spicy phenolics, fruity esters and providing a dry, acidic finish. 3724 is also notorious for stalling out, so I co-pitched with the S. “brux-like” trois, a highly attenuating yeast that imparts flavors of mango and pineapple. I thought they both would work well with the tropical flavors of the Cashmere hops I was able to use.

If you wanted to keep it to a single yeast strain, I would recommend Wyeast 3711 French Saison or the Danstar Belle Saison. Additionally, if you want to avoid Belgian yeast all together, you can use any American ale strain to create a clean IPA.

WET-HOPPED

Use your favorite bittering hop (I like Magnum) for a 60 minute addition to achieve around 50 IBUs, or 60 IBUs if you want a high level of bitterness. Starting at 30 minutes until flameout add approximately an ounce (3-5 handfuls) of wet hops every 5 minutes. Dump any remaining hops, or around 4-8 oz if you have an extreme amount left, in at flameout to get a huge burst of aroma and flavor. Be sure to stir the hops in as you go to make sure they are submerged into the wort.

Saturday, March 5, 2016

Brew of the Month, March Edition: Joe's Witbier

By Joe Potter

Last month, a certain Pennsylvanian rodent predicted an early spring, but with the way March has started, that might be wishful thinking. Keeping in that spirit, however, March’s BOTM is a refreshing Witbier, which (I’m hoping) might help beckon in spring a little sooner. If brewed now (or soon), the beer will be ready to enjoy when this month, presumably, goes out like a lamb.

I tried a handful of new things with this brew: I mashed in with water directly from my tap, performed my first step mash, added fresh orange zest, and fermented with a brand new yeast strain, the K-97 from Safale™. The yeast is a German ale strain with low ester production, also recommended for Belgian wheat beers. It forms a nice, firm head during fermentation making it great for “top cropping,” the act of harvesting yeast from an already active fermentation and pitching it into a new batch. Top cropping can be used when you’re brewing multiple batches close together, saving you money on yeast.  

The resulting beer is straw colored, and almost glows. A small amount of flaked oats lends it a haziness reminiscent of sundown on a summer day, where imbibing began an hour or two earlier. It’s aroma is wheaty and sweet, with a touch of tartness. The citrus is subtle, but becomes incredibly prevalent as the beer warms. It’s smooth and creamy, medium-bodied, with a long finish due to the lower attenuation of the yeast. In an act of stylistic defiance, I left out the traditional coriander. I now feel the beer would benefit from some spicy complexity, perhaps black peppercorn. Feel free to make it your own.

My starting gravity was 1.043, and the beer finished out at 1.008, giving the K-97 an apparent attenuation of 81% (which is exactly what Safale™ reports on their website), and a nice 4.6% ABV. Here is the recipe for 5.5 gallons:

All Grain ($18.63)

    • 5 lbs Castle Pilsner
    • 4.5 lbs Briess Flaked Wheat
    • 0.5 lbs Briess Flaked Oats

Partial Mash ($19.84)

    • 0.25 lbs Pilot 6-Row
    • 0.5 lbs Briess Flaked Oats
    • 6 lbs Briess Wheat LME

Boil/Hops

    • 0.75 oz German Hallertau @ 60 mins
    • 0.25 oz German Hallertau @ 15 mins
    • Zest of one orange @ 5 mins          
If you care, here is the mash schedule I used: Having a grain bill composed of 50% adjuncts, I decided to try my first step-mash with a protein rest at 128° F for 20 minutes before raising the mash temperature to a usual 154° for starch-breakdown.

I discovered that the hottest water which runs out of my tap is a piping 133°. Incidentally, for my mash tun, this is nearly the perfect temperature to achieve 128° after infusion. I used the side sprayer to “mash in” directly from the sink, and kept filling until I arrived at what I estimated to be a 1:1 quarts to pounds ratio. (This is essentially analogous to the couple breweries I know of which utilize tankless water heaters to provide their mash and sparge water, forgoing hot liquor tanks altogether.)

After the 20 minute rest, I infused boiling water from my pot to get up to 154°. My reasoning was that starting with a relatively thin mash ratio of 1:1 would allow me to infuse as much water as needed to bump up the temp while still staying close to the totally reasonable ratio of 2:1. (No surprise, this required way more hot water than I expected, so I recommend having a lot on hand and ready to go before even mashing in.) I added just enough hot water to bring me up to temp, and rested for an additional 30 minutes before sparging.

I hope you enjoy this brew and that it succeeds in building excitement for the approaching summer and brewing season. Brew on, Grand Rapids.

The staff at Siciliano's is always eager to answer your homebrewing questions. Stop by for help developing custom-made recipes like this one!

Monday, January 4, 2016

Brew of the Month, January Edition: Oatmeal Stout

Matt Ross
By Matt Ross

Starting this month, Siciliano’s Market is making a few changes in our homebrew section. Along with the continual updating of inventory, we are releasing a monthly staff-developed recipe. Each recipe will be written and brewed by us and tested for quality with friends and family.

We are kicking off the first Brew of the Month with an Oatmeal Stout. It is a rich and creamy beer with a focus on chocolate malt and roasted barley. To bring out a thicker body, we mashed at higher temperatures, did a two-hour boil and fermented with Wyeast 1272 American Ale II. In my experience, this yeast does not attenuate as fully as other American strains. When we brewed this recipe our OG was 1.058. The beer finished at 6.5% ABV. The finished product reminded me and fellow staffer Joe Potter of oatmeal flavored subtly with peanut butter and chocolate.

Joe Potter
For me, homebrewing is about full creative expression and making whatever you want. In that spirit we decided to cold steep the darker grains instead of mashing with them. This gives a more subtle chocolate coffee character without any astringency. We encourage people to look at this recipe and make it their own. In other words, we outfitted the recipe but each brewer is the artist.

January’s Oatmeal Stout recipe is available for both all grain and partial mash brewers. For 5.5 gallons, this recipe's ingredients will cost around $31 and about a buck more for the partial mash version. Ask any of our staff about the Brew of the Month and stay tuned for recipes to come. Brew on, Grand Rapids.

All-Grain Ingredients

    • 9-lbs Maris Otter
    • 8-oz Chocolate Malt
    • 12-oz Roasted Barley
    • 12-oz Victory Malt
    • 6-oz Caramel 40L
    • 1-lb Flaked Oats
    • 1-oz Fuggle @ 60min
    • 1-oz Fuggle @ 30min
    • Wyeast 1272 American Ale II or Safale US-05

Partial Mash Ingredients

    • 6.75-lbs Light Liquid Malt Extract
    • 8-oz Chocolate Malt
    • 12-oz Roasted Barley
    • 12-oz Victory Malt
    • 6-oz Caramel 40L
    • 1-lb Flaked Oats
    • 1-oz Fuggle @ 60min
    • 1-oz Fuggle @ 30min
    • Wyeast 1272 American Ale II or Safale US-05
The steep 
The kettle
"When you gaze long into an abyss the abyss also gazes into you."
-Nietzsche

Wednesday, January 9, 2013

Siciliano's to Publish Annual Homebrew Recipe Book

By Steve Siciliano

Starting this year, homebrewers receiving the highest scores in the Siciliano’s Homebrew Competition will be given the opportunity to see their award-winning recipes in print. Beginning with the 2013 competition, Siciliano’s Market Press will publish—with the brewers’ permission—the recipes of gold and silver medalists' in an annually produced, high-quality publication.

The Siciliano’s Homebrew Competition has grown steadily over the years with last year’s competition drawing 220 entries. Entries are judged according to BJCP style guidelines by certified judges, brewing professionals and hobby enthusiasts.

The tentative blueprint for the annual, large-format paperback will include a short introduction and a discussion of brewing styles (all grain, partial mash, extract with specialty grains) followed by the recipes for each of the three techniques. Bios and photos of the award-winning brewers will also be included. Please stay tuned to The Buzz for more information. Updates will be posted as warranted.

Thursday, December 13, 2012

Recipe: John's Cranberry Chestnut Bread

John's Cranberry Chestnut Bread
By John Barecki

Bread is truly a simple process—flour, water, yeast, and salt. All ingredients are capable of producing great elements of flavor on their own, but when combined they form something wonderful for the senses. Add another ingredient or two and the results can be remarkable.

I just put together an easy chestnut and cranberry bread recipe that will go perfect with just about any meal (note: walnuts will work just as well as chestnuts). I begin by mixing up a starter, something called called a biga, which is simply flour, water, and a little yeast mixed together and allowed to ferment for 13 to 16 hours in order to give the finished bread more complexity and flavor. After the biga ferments, I mix it and all remaining ingredients together by hand, let it rise, bake and cool. All in all it takes about 3 to 4 hours to complete this recipe, not counting the fermentation of the biga. See below for a more detailed look at my recipe.

To make a biga

    • 180 grams white bread flour (about 1.5 cups)
    • 107 grams 70-degree water (about 1/4 cup)
    • 1.3 grams instant yeast (about 1/4 teaspoon)
Mix all ingredients together into a shaggy ball and knead until it becomes tight and rubbery. Do not add any additional water. Place ball into a container big enough to allow the dough to double in size and coated with nonstick spray. Allow to rise 1-2 hours. It can be used at this point, but if you lightly push it down and keep it in the refrigerator overnight for 12 hours it will develop more flavor and complexity.

Final Dough Recipe

    • 163 gram Kamut wheat* (about 1.25 cups)
    • 247 grams white flour * (about two cups)
    • 247 grams spring white wheat* (about two cups)
    • 462 grams 95-degree water (about 16 oz)
    • 52 grams maple syrup (about 2 oz)
    • 16 grams salt* (about 1 tablespoon)
    • 2.5 grams instant yeast* (3/4 teaspoon)
    • 2 cups fresh cranberries chopped
    • 3 cups shelled chestnuts (or walnuts) roughly chopped
    • All of the Biga
*Denotes ingredients available at Siciliano's

Mix all ingredients together. Start by adding the biga to the water to warm it up and to make it more pliable. Slowly add the dry ingredients, mixing until they are mostly incorporated. Place dough on a stable work surface and knead or mix for 10 minutes. Put dough in a greased container and allow to proof for 45 minute. After that, take the dough and pull it lightly, folding it onto itself once. Then allow one more 45 minute rest.

If you are using a baking stone or a steaming tray place it into the oven set to 450 degrees. Form dough into a round and do a final rest for 1 to 1.5 hours. To see if it is ready, lightly press with your finger and see if the dough springs back. If it does, it's ready. Carefully pour water into your steaming tray, or use a spray bottle and mist a few times after you have placed the dough in the oven. Bake for 30 to 40 minutes. If the top is browning too quickly, put a sheet of aluminum foil on top. Take the bread from the oven and place on a cooling rack for 15 minutes and enjoy!

There are many many possibilities when it comes to bread and we have just about everything, ingredient-wise, to facilitate them. So the next time you're in the store and need something new to try, be sure to check out our bakery corner in the homebrew selection.

Shelling chestnuts

Monday, November 26, 2012

Don't Take Stock, Make It

The method and importance of reintroducing homemade stock into everyday kitchen practices.

By Wes Eaton

Stock is a simple, yet too often overlooked part of kitchen practices. Meaty bones, carcasses, grizzle, and trimmings are not only left out of much of the packaged products now available across America, but when they are brought home, they are often neglected and ultimately wasted. Why is this so? The decline of stock-making practices results from both structural changes, as in changing retail and meat packing practices that prioritize individual, boneless/skinless fillets, as well as from a shrinking understanding and appreciation for both the practice and purpose for making stock in the home.

What I want to do here is begin to point us toward ways of addressing the latter of these issues, the knowledge gap in stock-making practice and purpose. To do so, I want to emphasize the simplicity of making stock, and arranging a stock making practice that allows us to truly make this an “everyday” (or, more likely “every-week”) kitchen practice. I also want to draw upon two of may favorite sources of kitchen lore and science, Sally Fallon’s Nourishing Traditions, and Harold McGee’s On Food and Cooking, and share a bit about the ways stock nourishes, protects, and heals our bodies.

Falling somewhere between myth and science, homemade stock, concocted from fish, poultry, and ruminant bones, grew infamous for its nourishing, health benefits well before the scientific, industrial, and accompanying medical revolutions. Today, however, retail stock, and its sisters restaurant broth and soup in general, are demonized as MSG- and salt-laden health risks. Yet in reality, stock is nourishing in at least three important ways, as pointed out by Fallon. First, meat stock contain the minerals, such as calcium and potassium, from bone, cartilage, marrow, as well as vegetables. The slow process of simmering, and the addition of a small amount of acidic vinegar, help draw this out. Second, the gelatin which the simmer isomerizes into solution, has the special property of attracting liquids, making foods easier to digest. Moreover, the gelatin, in combination with the other ingredients in stock, heals the mucus lining of the small intestine, which is regularly inflamed and damaged by other things in our modern diets.

Finally we come to taste and cooking qualities. Stock, which is best stewed slowly on stove top throughout a blustery day, adds exquisite depth to soups, stews, and other dishes like risotto and quinoa. Stocks can be clear or cloudy, depending on cooking processes, but all stocks carry their concentrated ingredients in a full bodied, gelatinous, and rich form, perfect for thickening sauces.

To make stock, McGee instructs us to begin with cold water, which allows the proteins of the meat to heat slowly, and therefore fall out of solution, allowing the cook to skim off extra foam and particulates, leaving a generally clear liquid if the boil is not too vigorous. My stock, however, is often cloudy. What should be added to stock? Remember, the idea is to dissolve, through simmering, base components of vegetables, meats, and bones, into a homogenous liquid. There are generally four categories of stock: beef, chicken, fish, and vegetable. McGee points out that the meat itself contributes the depths of flavor, while the bones and skin provide the gelatin; so a bit of both seems prudent.

There are countless arrangements of recipes, so here I want to share my particular practice of making chicken stock. I use the word practice to emphasize that this is more than a recipe, and more than simply a procedure, but rather, as a household practice, chicken stock is part of our family’s routine. First you need a bird, or more specifically, a carcass. Being the holidays, there ought be plenty of turkeys, for instance, to go around. Once or twice a month we purchase a broiler from Rakowski Farms and use this meat and stock throughout many of the weeks’ meals.

Once the bird is cooked, and we roast a whole chicken, and the meat largely removed, situate the carcass on the bottom of a stock pot—arguably the most important tool in the kitchen, next to fire. Per McGee, add cold water. How much depends on the size of the bird, but at least halfway. Heat the mixture to a boil and skim off coagulated proteins before adding additional ingredients. These ought to include, at the least, a couple tablespoons of vinegar or wine to help break things down (this will cook off), carrots, celery, and onions. For spices, leave out the salt. This way you can always salt your ensuing recipes to taste. Instead, add a few bay leaves, black peppercorns, fresh parsley, fresh or dried sage, and a spring of fresh thyme. Continue to simmer, uncovered, all day. Use your discretion, but the longer the better. If you reduce the volume too much, you are producing fumet or demi-glaze that can later, however, be reconstituted with water. 

When you are satisfied with your stock, it's time to prepare it for storage (if you are not using immediately for the split pea soup recipe I give below). To do this, pour the contents of the stock pot through a colander into a large mixing bowl or other storage container to cool. I recommend utilizing the back porch so as not to warm your fridge. Once chilled, you will notice two things. First, the fat will have risen and hardened on top. You can scrape this off and discard, or cook with it if you are using duck. Second, in this cooled state, the stock will resemble straw-colored jello, thickened from the gelatin. To store, I recommend scooping into gallon freezer bags and flattening these on their sides for easy stacking, or keeping in the fridge if you plan to cook within the week. Frozen stock keeps for months, so mark your containers with dates and rotate. Keeping stock on hand will help you make this into a part of your own cooking and eating routine.

Chicken Stock 

    • One or more chicken, turkey, or game bird carcasses, trimmed of fat but heavy on skin and trimmings
    • Celery, carrots, onions, scrubbed and coarsely chopped
    • Bay leaves, peppercorns, fresh or dried sage, fresh thyme, fresh parsley
    • Cold water at least half way up the pot 
Split Pea Soup 

    • 2 tablespoons butter
    • Large finely chopped onion
    • 2 minced garlic cloves
    • 7 cups chicken stock
    • Large smoked ham hock
    • 1 slice of smoked pork/ham
    • 1 pound split green peas
    • Fresh thyme sprigs
    • Bay leaves
    • 2 carrots, peel and cubed
    • 1 celery rib, cubed
    • Black pepper 
In a dutch oven (preferably cast iron), warm the butter, saute the onions and then add garlic and cook for no more than an additional minute while stirring. Next, add remaining ingredients, but leave out the carrots and celery. Raise to a boil, then simmer 45 minutes until peas are tender, but not mush. Next, remove the pork steak, and using a fork, shred and store this in a tupperware to keep from drying out. Add the celery and carrots. Cook for additional 30 minutes then remove the bone, bay leaves, and sprigs, and add back in the shredded meat. Season with salt and pepper if need be.

Thursday, October 4, 2012

Sam Siciliano's Homemade Kapusta Recipe

Sam Siciliano
By Steve Siciliano

For the past ten years or so we have capped off our big fall sale during Customer Appreciation Week by setting up a make-shift hot dog stand and treating our loyal customers to German wieners, draught root beer and homemade sauerkraut, aka kapusta. While the dogs and suds always garner their share of accolades, it is the kapusta hand-crafted by my father, Sam Siciliano, that has emerged as the undisputed star of this annual event. Today we share Sam’s kapusta recipe in response to dozens of requests.

Ingredients

    • 2 lbs. canned sauerkraut, drained 
    • ¾ head of cabbage, shredded
    • 1.5 cup onion, diced
    • 1.5 cup celery, diced
    • 2 bay leaves
    • 2 garlic cloves, minced
    • 2 15 oz. cans chicken broth
    • Pork steak, pork roast or spareribs
    • Brown sugar
    • Salt & pepper to taste 
Directions: Sauté onions, celery, garlic and pork in oil. Add drained sauerkraut and chicken broth and simmer for fifteen minutes, Add bay leaves, salt and pepper to taste. Add shredded cabbage and simmer for one hour, Add brown sugar to taste.

*Special thanks to Neve Trumpeter for the great candid photo of Grandpa Sam. It was taken this summer on Sam's property up North.

Monday, August 13, 2012

Recipes Revisited: Four for the Summer Bounty

Here again is former staffer, current contributor Wes Eaton with a batch of great recipes (originally published last year). These are designed to coincide with the late summer bounty hitting gardens and farmers markets just about now.

By Wes Eaton

August begins to reveal the full possibility of fresh Michigan produce. Early summer’s kale, swiss chard, lettuce and collard greens are making way for tomatoes, carrots, beets, cucumbers, garlic and squash—a welcome transition, especially for seasonal eaters. Here I’ve put together four of my favorite summer recipes, complete with beverage partners. These recipes are simple and delicious, and most (if not all) of the ingredients can be found at your favorite farmers market. When seeking out these seasonal items, don't be shy, ask the farmer when they were harvested. We’re in the midst of the bounty here—if the veggies were picked over two days ago head to the next booth.

Pico

Homemade salsa recipes are often complex, but when you start with Romas ripened on the vine and cilantro clipped from the planter, little else is needed. Try this recipe as-is before doctoring it up.

Ingredients:

    • 8 Roma tomatoes
    • two medium white or candy onions
    • one bunch cilantro
    • one lime
    • kosher salt to taste. 
Core and cube tomatoes in a large bowl. Chop cilantro, stem and all, leaving only the ends of the stems out of the bowl. Add along with chopped onion and juice from one lime, add salt to taste, chill and serve with lime-garnished Vienna Lagers—Great Lakes Elliot Ness, for example.

Pesto

Like salsa, pesto too can be made complex, but start here. Complements to Stephen Gasteyer for this easy yet rich and decadent recipe. Use as a sauce for pastured chicken or make a summer lunch by serving over chilled angel hair with a simple lettuce, balsamic, oil, sea salt and black pepper salad. You’ll plant an entire row of basil next year.

Basil, and lots of it
Ingredients:

    • 1 cup fresh basil leaves
    • 1 garlic clove
    • 1/3 cup olive oil
    • 1/4 cup pine nuts
    • 1/4 teaspoon kosher salt. 
If raw, toast the pine nuts ever so gently in a cast iron skillet. Layer ingredients into a food processor or blender and blend to desired consistency. Amazing how the individual parts become an entirely new whole. Freeze in baggies with air removed and amaze yourself in late March. This sauce pairs well with European-style pilsner, which cuts the richness of the pesto. Try Victory Prima Pils, Lagunitas Pils, or Pinkus Organic Ur Pils.

Tomato Salad

The simplest recipe here, inspired by my pal the Perch, this dish is the perfect way to feature the wealth of tomatoes and cukes on farm stands everywhere this month.

Ingredients: Roma tomatoes cut into large cubes, same portion of fresh picked cucumbers, halved and sliced, half as much coarse chopped basil, olive oil, sea salt, fresh cracked black pepper. Mix in a large bowl and serve with a draft cider, homebrewed if possible, but Magners Irish Cider or Michigan-made J.K.'s Scrumpy Cider will both do in a pinch.

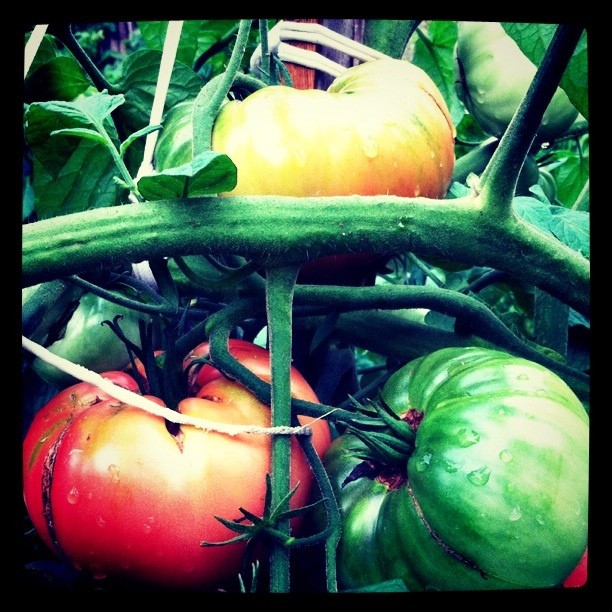
Perch's note: for an acidic kick, try adding balsamic or red wine vinegar to taste; also, if you can't find Romas, any tomato will do, even heirloom tomatoes (pictured below).


Fermented Dill Pickles

Why fermented and not canned? Pickling cucumbers are at their peak in high summer, but through the process of fermentation--in this case with lactobacillus bacteria--you can inhibit spoilage and enjoy them all year. Once a staple farm food, fermented dills were usually a messy affair cellared in frothy crocks and barrels. Much easier is to simply ferment pickles in the quart jars you would later store them in anyway, which is how I recommend you make these delicacies.

Taste is another reason to go the fermentation route--these are the best pickles I’ve ever had. I admit, it's taken me more than a couple seasons to perfect this process. But like all forms of fermentation, producing these pickles yourself is as much an art as it is a science. What this means is that practice and patience play key roles in achieving success, much like in making beer and wine.

To introduce yourself to the science, first read up on fermentation here. (The art part you’ll have to find on your own.) Next, decide how many pickles you want to eat and hand out later this fall and over the holidays. Keep in mind that you can fit 3-4 large and 5-8 smaller pickling cukes in a one-quart jar.

For each quart of pickles you’ll need approximately two cups of brine. Here’s a good formula for about one quart of brine: 3 cups water, boiled and cooled, 3/4 cups white vinegar, 1/4 cup canning salt.

The other ingredients you need include fresh-picked and washed pickling cucumbers, fresh heads of dill, sliced hot peppers, fresh garlic cloves and pickling spice. The key to a good pickle is buying or picking them fresh and using them the same day. If you’re reading this in Grand Rapids, you’ve got about two weeks left of pickle season. I suggest getting over to the Fuller St. Farmers Market and talking with the folks at Visser Farms. A good pickle is firm and boxy. Avoid bloated pickles—they were picked too late. Pickling spice is widely available; however, Global Infusion in the East Hills neighborhood sells organic pickling spice in bulk for $0.95 an ounce, which is a great deal.

To get your pickles going, start by mixing the brine. Stuff everything else into the clean jar and top up with brine. For each jar, use at least three heads of dill, some dill greens, two cloves of sliced garlic and one tablespoon of pickling spice. Loosely seal the lid and store out of the light around 70F. In a few days the clear brine will turn cloudy as the fermentation process begins. In a couple weeks CO2 bubbles will cease. A finished pickle has a slight translucent color when sliced. The white sediment is the healthy bacteria. If the brine is still clear or the pickles turn to mush, compost them and try again next year. Either refrigerate or process in a gentle boiling bath for 15 minutes. Share with special people and serve with French- and Belgian-style farmhouse ales, like Vivant Farmhand, New Holland Golden Cap, or the classic Sasion Dupont.


Former Siciliano's staffer Weston Eaton is currently pursuing a PhD in Sociology at Michigan State University. He lives with his wife and dogs in Grand Rapids, MI, where pickling season is as much a state of mind as it is a time of year.

Thursday, August 9, 2012

Recipes Revisited: The Mighty Bread & Butter Pickle

Delicious!
With the harvest coming in, we thought now would be a good time to revisit some recipes we published last summer. First up, a recipe for a hamburger's best friend, the bread & butter pickle.

By Wes Eaton

The bread & butter pickle is a tangy, crisp fall and late summer favorite, yellow from turmeric, with a nuanced tang from vinegar and mustard seed. Cured in the jar, these sandwich toppers will add a touch of rustic homeyness to your usual fare. I’m putting up a double batch right now and encourage you all to do the same. Keep reading to learn how!

Here's a list of things you'll need:

    • Canning supplies (canning jars, bands, lids, canner)
    • 4-6 pounds pickling cucumbers
    • 2 pounds medium white onions
    • 1/3 cup canning salt
    • 2 cups sugar
    • 2 tablespoons mustard seed
    • 2 teaspoons Tumeric
    • 2 teaspoons celery seed
    • 1 teaspoon peppercorns
    • 3 cups vinegar
    • 1 bag ice 
Start by planting a garden. Okay, a little late now, so start at the farmers market, or even the grocery store’s produce section. We're in the heart of August, so fresh pickles will only be around a few more weeks. Ask for and choose firm, dark green, ‘box’ shaped pickles, no longer than six inches. Slice chips to a width of less than a quarter inch with a serrated tomato knife for authentic ridging. Peel and slice the onions thin and mix all together in a large bowl with canning salt. Cover the veggies with ice. This quick cold brine extracts excess water from the pickle chips and contributes to lasting firmness and crunch. Place in the fridge for an hour at least and then drain and rinse.

Driving out excess water with salt
Meanwhile, wash your canning jars in hot sudsy water while bringing your canner bath to a subtle boil. As the time nears, place remaining ingredients in another large pot and bring to a boil. Add the rinsed pickle chips and onions and return to a boil. With everything heated up, its time to carefully pack your jars, wipe the lips, screw on the lids and process in the boiling canning bath for ten minutes.

A medley of flavors
Let your jars cool somewhere away from cool late summer breezes. Patiently listen for the lids to pop in, indicating a good seal; it may happen quick, but could take an hour or so. Those that don’t seal can be stored in the fridge. This should give you plenty of time to reflect on your efforts--good food you carefully prepared yourself, with ingredients of your own selecting and choosing. Satisfaction is what I’m talking about, with product to show for your efforts. Laying down preserved food, much like laying down wine or beer, affords you a sense of participation in the creation of your daily surroundings--the stuff that makes up your reality. An existential leap? I’ll leave that up to you. As for the flavor and snap, it's a no brainer for fans of the mighty bread and butter pickle.

Sealing the time capsules

Former Siciliano's staffer Weston Eaton is currently pursuing a PhD in Sociology at Michigan State University. He lives with his wife and dogs in Grand Rapids, MI, where pickles aren't his bread & butter, but bread & butter are among his favorite pickles.

Wednesday, March 7, 2012

Jeff Carlson's roasted garlic cheddar mushroom bread

Consumate DIYer and all around good guy Jeff Carlson is back with another bread recipe (see his others here and here). This one incorporates a culinary trinity sure to please—mushrooms, garlic, and cheddar cheese—which Jeff adds to the standard no-knead recipe in the following amounts.

    • 454 grams white flour (1 lb)
    • 340 grams water (12 oz)
    • 1 teaspoon salt
    • 1/2 teaspoon active dry yeast
    • 4 oz sharp cheddar, cubed
    • 1/2 bulb garlic, par-baked and chopped
    • 4 oz rehydrated Shitake mushrooms, chopped
Tips & Tricks

  • To learn the no-knead method of bread baking, read this Buzz post - "No-Knead Bread: our take on a new classic" - or watch this video. For best results, do both.
  • Rather than fold cheese, garlic, and mushrooms into prepared dough, add them to the dry ingredients (flour, salt, yeast) and mix until well incorporated. Add the water last. 
  • To par-bake garlic first break the cloves out of the bulb and then spread them on a baking sheet. Bake at 425 for about 10 minutes. Garlic is ready when it's soft to the touch, but not mushy. The garlic will cook a great deal more when it bakes in the bread; the par-baking process makes the cloves easy to peel and chop, and also contributes flavor during the long fermentation. Let the garlic cool before mixing (it doesn't take long).
  • Recommended uses for mushroom water leftover from the rehydration process include soups and stocks. We imagine it would also be a hearty substitute for the plain old H2O in the recipe above. If you try it, be sure to strain the water through a fine mesh screen to separate any sand or grit.
  • Remember, Siciliano's Market now carries a wide selection of bread-making ingredients, including several kinds of flour and whole wheat berries, which you can grind free of charge in our flour mill.
  • If at any stage in the process your dough/bread looks at all like Jeff's (see pictures below), then congratulations, you're right on track.
Three amigos

Add the water last

Sweet dough whisk

The crust

The crumb

Cheers!

Monday, February 27, 2012

Learning how to “cleanse” in a dirty world

Christina's Quinoa salad
Former staffer Wes Eaton gives us the dirt on a month-long detox program he and wife recently completed. Wes includes a great-looking Quinoa recipe at the end of the essay. Note that Siciliano's now carries organic Quinoa in bulk ($3.99/lb) as well as the Agave nectar also called for in the recipe. 

By Wes Eaton

I get a lot of strange looks from people when I tell them I’m on a “cleanse.” If they know me, they wonder how I can go day after day without a pint, a sip of wine, some local sourdough, an afternoon square of chocolate, a slice of pizza from Harmony, a morning cup of coffee. People of less acquaintance wonder if I have health problems, or if I feel the need to lose some weight, and fast. The idea of withholding the simple gratifications of good food and drink is somewhat mysterious and perplexing if you see no reason or hear no calling.

When I was younger, I remember my mother would wilt spinach and toss it with vinegar. She liked it because it tasted good, sure, but she also knew that it was good for her, and sometimes she just desired ‘healthier’ foods (why not fresh spinach in a simple salad, I’ll have to ask her). Mind you, she raised us on Butternut Bread, Margarine, and Kraft Mac & Cheese and I’ve had a sweet tooth ever since, one I now nurture with deep red wines, rich ales, and bourbon.

And here I must make a fine distinction as to my motivation to cleanse, as we certainly all must confront our drive to be successful on such a quest. After a hearty season of celebrating, with a follow-up go at moderation, I was still essentially on a trajectory of gourmand decadence. Not in pounds per say, but in my very joints and tissues I felt I was weighted down, a little stiff, and due for an oil change. My hero Jim Harrison often writes about the morning bowl of oatmeal he takes as his penance for partaking too much the night/week before. On my new cleanse, however, not even simple oatmeal was permitted.

In some ways, a cleanse is like a fast. The way substances and toxins, products of immoderation and hedonistic cuisine, build up in one’s body over time, compounded with the unequal and unjust ratio of calories in versus calories expended, I felt I could go a few days without food and be none the worse. This was a romantic—as in fictional—understanding. One gets hungry if breakfast is missed, and by lunch, other options seem worth exploring. After all I did not have a religious calling to sacrifice eating, but rather a desire to freshen up and lose some clinging tension.

I believe in the importance of ignorance, and one of the many ways our Cartesian scientific roots has led us astray is with the false dichotomy between the mind and body, the intangible and the material. The important ignorance here is the conviction that our “self,” as in, how we go about choosing to “be” in this world, primarily comes about from conscious and mental decisions. On the contrary, I feel my whole body is very much part of my mind. And while a fast may lead to religious clarity, or supply the proper lucidity for a vision quest, I needed something more sustainable and doable in the sense of alignment with the other requirements of my life, which presently include reading, writing, and discussing—things that come as a challenge to me on an empty stomach.

The point of a cleanse, however, is not just to counteract individual, personal decisions about what to eat. As any literature on cleansing will remind you countless times, we live in a toxic world. Much of this toxicity can be traced to under adjudicated (as in less than democratic) forms of technologically aided industrial production. Rachel Carson first raised our awareness of the links between environmental degradation and health risks in 1962 with the publication of her book Silent Spring. So a cleanse aims to rinse our bodies of the toxins that come through our skin, or enter with our breath, as well as those we knowingly, or unknowingly, ingest. By cleansing, we heal ourselves of the malicious and creeping side effects that toxins foment.

So unlike a fast, we do eat on a cleanse. But what? There are many cleanse variations. The Master Cleanse, a liquid detox program, prescribes water with lemon, maple syrup, and cayenne pepper for as many days as you can take. Other variations include juice fasting, or blended fasting. Raw Food diets have been associated with countless miracles, and Ayurvedic diets are also associated with detoxification, albeit at a slower pace.

The cleanse I am on, however, is called “Clean” (with a book of the same title). The aim here is to eliminate foods that are difficult to digest or that cause allergic reactions (many of which we are so accustomed to we fail to make the connection between a range of discomforts and our foods). There are two parts to this. First, agitating and loosening toxins from our body. Some of the above practices can do this. But the second part, flushing those toxins by linking them with certain foods is the particular advantage of the “Clean.” This means removing dairy, sugar, most meats, stimulants (caffeine, alcohol), and gluten. 

At first glance this seemed daunting. Not only would I be hungry, but I would quickly need to learn to cook new dishes, and drop the habit of eating out. Instead of BLT’s, egg sandwiches or sandwiches of any kind, spaghetti, risotto, roasts, steaks, burgers, chips and salsa, not to mention IPAs, I would need to get by only on brown rice, raw veggies and fruits, a little fish and lamb, and nuts. While I’ve no room to spell specifics, essentially, going on “the Clean” means fruit smoothie for breakfast (fruit with almond or coconut milk, hemp protein, and cinnamon, for instance), a balanced lunch, such as salad, beans, Dal, veggies, fruit, Quinoa, and another smoothie or bowl of soup for dinner, drinking lots of water, and ensuring twelve hours between “dinner” and “breakfast.”

As I close out the last week of the four week program, I’d like to present some things I felt were key to my success (yes, I made it). The first, and most important, was doing the clean with a partner: my wife Christina. Cooking for one is very challenging, especially when you’re cooking new dishes and can’t fall back on your intuitive stock of kitchen knowledge. Christina studied the Clean book while I simply studied. She selected recipes, made countless lists, trips to Horrocks, winter farm markets, tried new creations, and, most importantly, meal-planned and cooked.

In short, we were thoroughly prepared, which is the second key. The third key was chicken stock, homemade. I often roast birds from the Rakowski’s (regional farmers) and make stock from the carcasses, we used our freezer full for brown rice, soups, and bean dishes, adding savory flavor. The final key was finding dishes that we liked, that were satisfying. For my sweet tooth, mangoes and fresh pineapples have been monumental. For drink, fresh fruit juices and sparkling water. For substance, the indispensable Quinoa. To close, I want to elaborate by sharing a recipe worthy of anyone’s plate. Inspired by a recipe in Clean, Christina made some changes and adapted what’s now one of my favorite lunches.

Christina’s Quinoa Salad
(Inspired by Alejandro Junger) 

    • 3 cups cooked Quinoa (start with one cup dry, try white or red)
    • 1 tablespoon chopper parsley
    • 1 cup currants
    • 1/3 cup chopped raw almonds
    • 1/2 cup diced carrots
    • 1/2 cup mint
    • 1/3 cup chopped scallions
    • 1/2 cup (or more) fresh lime juice
    • 1 1/2 tsp agave nectar
    • 1 tsp ground cumin
    • 1 1/2 tsp sea salt
    • 1/3 cup olive oil
    • Directions: simply mix together and enjoy.

Former Siciliano's staffer Weston Eaton is currently pursuing a PhD in Sociology at Michigan State University. He lives with his wife and dogs in Grand Rapids, MI.

Wednesday, December 7, 2011

Jeff Carlson's mother's Swedish rye bread (Limpa)

If you have a traditional or family recipe you think others might enjoy, don't hesitate, submit it to The Buzz editors today!

By Jeff Carlson

I grew up in a family surrounded by Swedish relatives and friends. My mom and dad would drag me, my brothers and sister to countless smorgasbords, either in homes or at the local Vasa Lodge. The air was full of great smells and heavy Swedish accents and most of the time I didn’t understand what was being said. One thing I did understand was that I liked bread, in particular, Swedish rye bread or Limpa. Most Limpa recipes contain molasses, fennel, anise, or caraway seeds, and (or maybe not) orange peel. Some recipes will actually call for stout as this bread was originally made from fermented brewer’s wort, the reason why it's also known as Vörtlimpa (“Wort loaf”).

My mother’s recipe is handed down from her mother. It contains fennel and anise, molasses, and a few other ingredients that aren’t too common, mashed potatoes and oats, for example. Also, if you can’t find lard or want a more heart-healthy version, use vegetable shortening or oil as a substitute. This recipe makes a very heavy and sticky dough. I’ve never tried to make it a smaller batch because it goes like crazy around my house. It always seems like I use more white flour then the recipe calls for. Maybe my liquid measuring skills aren't so good.

The finished bread is dense and moist and has a very intoxicating aroma of licorice. At our smorgasbord table, I really like this with a good sharp cheese -- Ost as we Sweds call it -- along with some thin-sliced summer sausage or salami. But to die for is topping it off with a good pickled herring (Inlagd Sill) imported from the mother country, not that Dutch stuff you get around here*. Cream cheese and Gravlax isn’t too shabby as a topping either. So, even if you’re not Swedish, give this bread a try, I think you really will enjoy it.

*The author's opinion of Dutch pickled herring does not necessarily reflect the opinion of The Buzz staff or its parent company, Siciliano's Market. Readers should know that Siciliano's privileges no nationality of pickled fish over any other.

Ingredients & Directions

    • 2 cups water
    • 1 big can evaporated milk
    • 1 cup white sugar*
    • 1 cup brown sugar
    • 1 Tbsp. salt*
    • ½ cup + 1 Tbsp. lard
    • 2 pkg. dry yeast*
    • ½ cup warm water
    • ¼ cup molasses*
    • ½ cup cooked oatmeal
    • 1 cup mashed potatoes
    • 2 tsp. anise seed
    • 2 tsp. fennel seed
    • 4 cups rye flour*
    • 6-8 cups white flour (more as needed)*
Dissolve sugar, salt, and lard in almost boiling water. Add molasses, oatmeal,
potatoes and seeds (course grind). Then add evaporated milk, mixture should be about
lukewarm. Dissolve yeast in ½ cup warm water, add to mixture. Stir in rye flour,
then add white flour. Use hands if necessary, as dough will be stiff and sticky. Knead
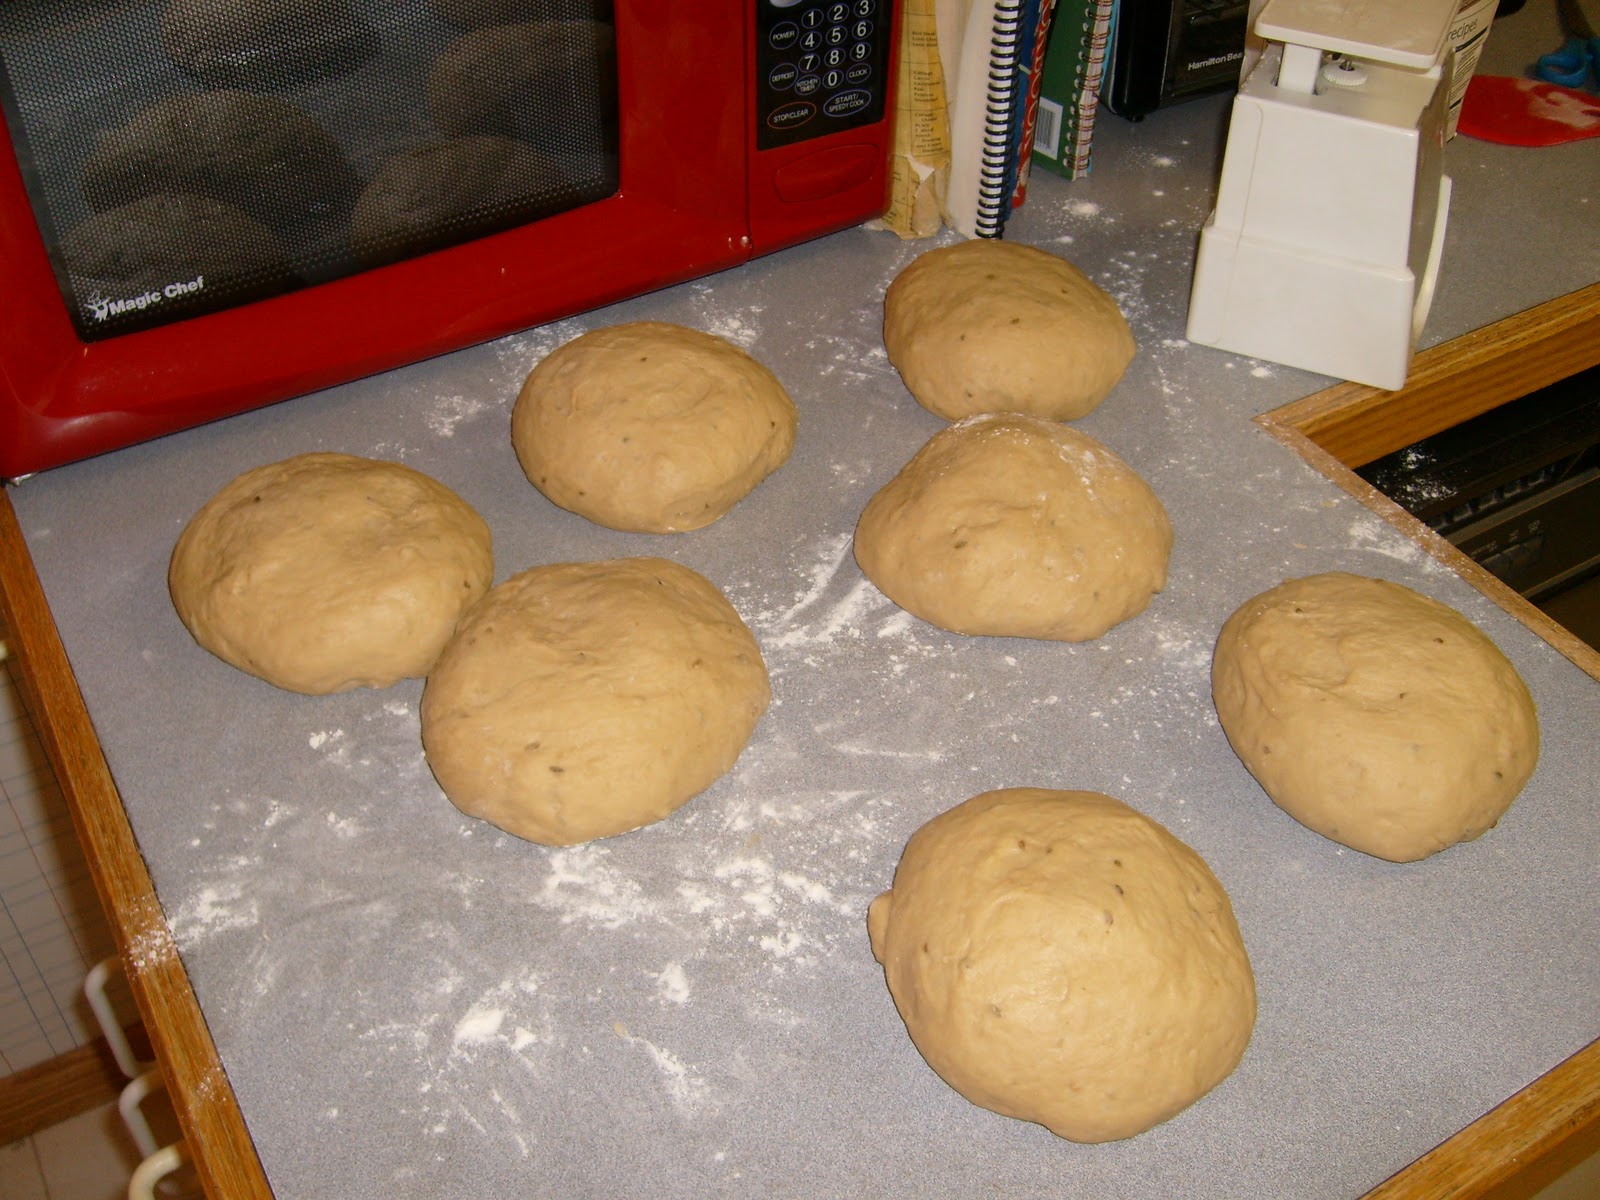
thoroughly, 6-8 minutes, let rise in bowl about 2 hours (or until roughly doubled.) Divide
dough into 5 or 6 loaves and let rise again in bread pans. Bake at 350 degrees F for about
50 to 55 minutes.

*Indicates ingredients for sale at Siciliano's Market.

Photos of the Process


Tack och god jul.
(Thank you and happy Christmas.)

Monday, November 14, 2011

Recipe: Jeff Carlson's no-knead spent grain bread

The following recipe and photos come care of Jeff Carlson, award-winning homebrewer & cidermaker, active member of the Primetime Brewers homebrew club, and longtime Siciliano's customer. Jeff sent us this take on the no-knead method which combines combines two of the greatest things in life, bread and brewing. In his words...

I did a No-Knead using some spent grain from last week's Learn to Homebrew Day. I made a batch of No-Sparge English Bitter, using pale malt, 60L and 150L crystal. I froze a cup or two of the mash. This weekend I unthawed it and dried it in a low oven (200F for about an hour). Took approximately ¾ cups, decreased the flour some, and added an extra ¼ cup of the finished beer in the mixture. Nice crust and crumb. I was going to bring some over to Siciliano's, but my hungry family ate it all. Went well with the seafood Paella I made.

The Buzz editorial staff anticipates experimenting with this recipe ASAP. We'll report back with any tips and tricks we discover. In the meantime, and thanks to the foundation Jeff provided, interested brewers/bakers should have no trouble trying this one on their own. Folks new to the no-knead method can learn all about it by reading No-knead bread: our take on a new classic. Thanks again, Jeff!


Everything in its place

The mix

"The dough also rises"

Excellent shape!

Won't last long, and neither will the
rosemary/thyme butter on the side