View our Main Site »
Showing posts with label bread. Show all posts

Thursday, December 13, 2012

Recipe: John's Cranberry Chestnut Bread

John's Cranberry Chestnut Bread
By John Barecki

Bread is truly a simple process—flour, water, yeast, and salt. All ingredients are capable of producing great elements of flavor on their own, but when combined they form something wonderful for the senses. Add another ingredient or two and the results can be remarkable.

I just put together an easy chestnut and cranberry bread recipe that will go perfect with just about any meal (note: walnuts will work just as well as chestnuts). I begin by mixing up a starter, something called called a biga, which is simply flour, water, and a little yeast mixed together and allowed to ferment for 13 to 16 hours in order to give the finished bread more complexity and flavor. After the biga ferments, I mix it and all remaining ingredients together by hand, let it rise, bake and cool. All in all it takes about 3 to 4 hours to complete this recipe, not counting the fermentation of the biga. See below for a more detailed look at my recipe.

To make a biga

    • 180 grams white bread flour (about 1.5 cups)
    • 107 grams 70-degree water (about 1/4 cup)
    • 1.3 grams instant yeast (about 1/4 teaspoon)
Mix all ingredients together into a shaggy ball and knead until it becomes tight and rubbery. Do not add any additional water. Place ball into a container big enough to allow the dough to double in size and coated with nonstick spray. Allow to rise 1-2 hours. It can be used at this point, but if you lightly push it down and keep it in the refrigerator overnight for 12 hours it will develop more flavor and complexity.

Final Dough Recipe

    • 163 gram Kamut wheat* (about 1.25 cups)
    • 247 grams white flour * (about two cups)
    • 247 grams spring white wheat* (about two cups)
    • 462 grams 95-degree water (about 16 oz)
    • 52 grams maple syrup (about 2 oz)
    • 16 grams salt* (about 1 tablespoon)
    • 2.5 grams instant yeast* (3/4 teaspoon)
    • 2 cups fresh cranberries chopped
    • 3 cups shelled chestnuts (or walnuts) roughly chopped
    • All of the Biga
*Denotes ingredients available at Siciliano's

Mix all ingredients together. Start by adding the biga to the water to warm it up and to make it more pliable. Slowly add the dry ingredients, mixing until they are mostly incorporated. Place dough on a stable work surface and knead or mix for 10 minutes. Put dough in a greased container and allow to proof for 45 minute. After that, take the dough and pull it lightly, folding it onto itself once. Then allow one more 45 minute rest.

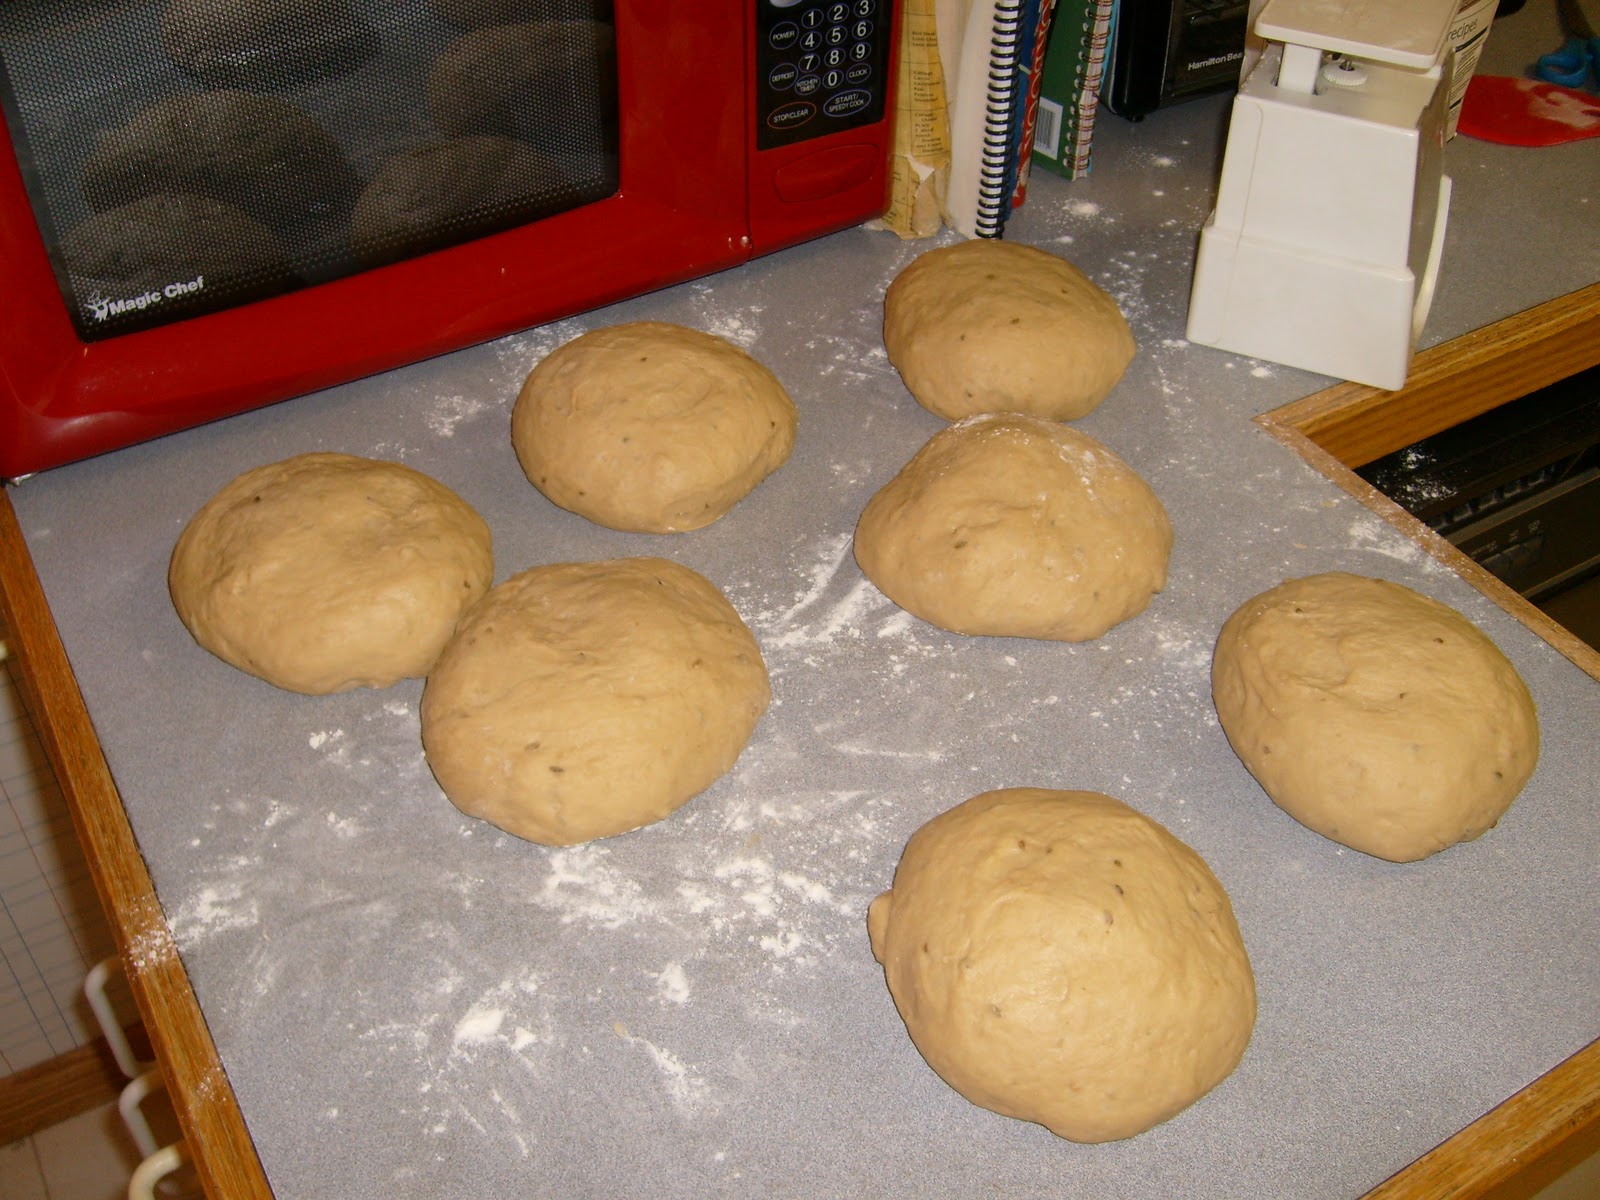
If you are using a baking stone or a steaming tray place it into the oven set to 450 degrees. Form dough into a round and do a final rest for 1 to 1.5 hours. To see if it is ready, lightly press with your finger and see if the dough springs back. If it does, it's ready. Carefully pour water into your steaming tray, or use a spray bottle and mist a few times after you have placed the dough in the oven. Bake for 30 to 40 minutes. If the top is browning too quickly, put a sheet of aluminum foil on top. Take the bread from the oven and place on a cooling rack for 15 minutes and enjoy!

There are many many possibilities when it comes to bread and we have just about everything, ingredient-wise, to facilitate them. So the next time you're in the store and need something new to try, be sure to check out our bakery corner in the homebrew selection.

Shelling chestnuts

Wednesday, March 7, 2012

Jeff Carlson's roasted garlic cheddar mushroom bread

Consumate DIYer and all around good guy Jeff Carlson is back with another bread recipe (see his others here and here). This one incorporates a culinary trinity sure to please—mushrooms, garlic, and cheddar cheese—which Jeff adds to the standard no-knead recipe in the following amounts.

    • 454 grams white flour (1 lb)
    • 340 grams water (12 oz)
    • 1 teaspoon salt
    • 1/2 teaspoon active dry yeast
    • 4 oz sharp cheddar, cubed
    • 1/2 bulb garlic, par-baked and chopped
    • 4 oz rehydrated Shitake mushrooms, chopped
Tips & Tricks

  • To learn the no-knead method of bread baking, read this Buzz post - "No-Knead Bread: our take on a new classic" - or watch this video. For best results, do both.
  • Rather than fold cheese, garlic, and mushrooms into prepared dough, add them to the dry ingredients (flour, salt, yeast) and mix until well incorporated. Add the water last. 
  • To par-bake garlic first break the cloves out of the bulb and then spread them on a baking sheet. Bake at 425 for about 10 minutes. Garlic is ready when it's soft to the touch, but not mushy. The garlic will cook a great deal more when it bakes in the bread; the par-baking process makes the cloves easy to peel and chop, and also contributes flavor during the long fermentation. Let the garlic cool before mixing (it doesn't take long).
  • Recommended uses for mushroom water leftover from the rehydration process include soups and stocks. We imagine it would also be a hearty substitute for the plain old H2O in the recipe above. If you try it, be sure to strain the water through a fine mesh screen to separate any sand or grit.
  • Remember, Siciliano's Market now carries a wide selection of bread-making ingredients, including several kinds of flour and whole wheat berries, which you can grind free of charge in our flour mill.
  • If at any stage in the process your dough/bread looks at all like Jeff's (see pictures below), then congratulations, you're right on track.
Three amigos

Add the water last

Sweet dough whisk

The crust

The crumb

Cheers!

Wednesday, December 7, 2011

Jeff Carlson's mother's Swedish rye bread (Limpa)

If you have a traditional or family recipe you think others might enjoy, don't hesitate, submit it to The Buzz editors today!

By Jeff Carlson

I grew up in a family surrounded by Swedish relatives and friends. My mom and dad would drag me, my brothers and sister to countless smorgasbords, either in homes or at the local Vasa Lodge. The air was full of great smells and heavy Swedish accents and most of the time I didn’t understand what was being said. One thing I did understand was that I liked bread, in particular, Swedish rye bread or Limpa. Most Limpa recipes contain molasses, fennel, anise, or caraway seeds, and (or maybe not) orange peel. Some recipes will actually call for stout as this bread was originally made from fermented brewer’s wort, the reason why it's also known as Vörtlimpa (“Wort loaf”).

My mother’s recipe is handed down from her mother. It contains fennel and anise, molasses, and a few other ingredients that aren’t too common, mashed potatoes and oats, for example. Also, if you can’t find lard or want a more heart-healthy version, use vegetable shortening or oil as a substitute. This recipe makes a very heavy and sticky dough. I’ve never tried to make it a smaller batch because it goes like crazy around my house. It always seems like I use more white flour then the recipe calls for. Maybe my liquid measuring skills aren't so good.

The finished bread is dense and moist and has a very intoxicating aroma of licorice. At our smorgasbord table, I really like this with a good sharp cheese -- Ost as we Sweds call it -- along with some thin-sliced summer sausage or salami. But to die for is topping it off with a good pickled herring (Inlagd Sill) imported from the mother country, not that Dutch stuff you get around here*. Cream cheese and Gravlax isn’t too shabby as a topping either. So, even if you’re not Swedish, give this bread a try, I think you really will enjoy it.

*The author's opinion of Dutch pickled herring does not necessarily reflect the opinion of The Buzz staff or its parent company, Siciliano's Market. Readers should know that Siciliano's privileges no nationality of pickled fish over any other.

Ingredients & Directions

    • 2 cups water
    • 1 big can evaporated milk
    • 1 cup white sugar*
    • 1 cup brown sugar
    • 1 Tbsp. salt*
    • ½ cup + 1 Tbsp. lard
    • 2 pkg. dry yeast*
    • ½ cup warm water
    • ¼ cup molasses*
    • ½ cup cooked oatmeal
    • 1 cup mashed potatoes
    • 2 tsp. anise seed
    • 2 tsp. fennel seed
    • 4 cups rye flour*
    • 6-8 cups white flour (more as needed)*
Dissolve sugar, salt, and lard in almost boiling water. Add molasses, oatmeal,
potatoes and seeds (course grind). Then add evaporated milk, mixture should be about
lukewarm. Dissolve yeast in ½ cup warm water, add to mixture. Stir in rye flour,
then add white flour. Use hands if necessary, as dough will be stiff and sticky. Knead
thoroughly, 6-8 minutes, let rise in bowl about 2 hours (or until roughly doubled.) Divide
dough into 5 or 6 loaves and let rise again in bread pans. Bake at 350 degrees F for about
50 to 55 minutes.

*Indicates ingredients for sale at Siciliano's Market.

Photos of the Process


Tack och god jul.
(Thank you and happy Christmas.)

Wednesday, October 26, 2011

Recipe: No-knead olive bread

File this in the category of special-occasion breads along with Red Cheddar Flake and Roasted Garlic No-Knead.

By Chris Siciliano

Few things in life go together so well as bread and olives. While some familiar combinations might be their equal--wine & cheese, beer & brats, Hall & Oates--there is little that outshines a crust of good bread and a few ripe kalamatas. Fact is, one of the best meals of my life consisted of little more than these two ingredients, a bit of cheese, and good company.

It makes perfect sense then that the addition of olives to the standard no-knead bread recipe would result in a whole far greater than the sum of its parts. Of course, that's just my opinion. I suggest you test the hypothesis yourself. For the recipe, see below.

  • 454g (1 lb) white flour
  • 340g (12oz) water
  • 1/4 teaspoon instant yeast
  • 9-12g (1.5-2 tsp) salt
  • 5.75oz jar manzanilla olives, drained, sliced or chopped
Tips & Tricks

  • To learn the no-knead method, click here. Or, watch these two short videos, here and here.
  • I use manzanilla olives with pimentos because we usually have an unopened jar in the pantry for pizza and bloody marys. Any other olive will taste just as good, and maybe better. Double-check though that the olives are without pits. Nothing ruins a good meal faster than a mouthful of broken teeth.
  • Remember, olives are salty. Depending on your tastes and diet, you might want to back off on the total amount of salt you add. Sometimes I back off by about half a teaspoon for a total of 1.5 tsps, that's 9 grams if you're measuring by weight. Then again, sometimes I just use the full amount of salt (2 tsp), blood pressure be damned. It's up to you the route you want to go. You can get away with 1 tsp or even a little less.
  • Usually I start slicing the olives in meticulous and uniform fashion. Halfway through I grow impatient and begin chopping indiscriminately. I find this strategy suits me. Add the sliced/chopped olives directly to the dry ingredients before you add the water.


Wednesday, June 8, 2011

Roasted Garlic No Knead Bread

By Chris Siciliano

Here's another in the category of special-occasion breads. Like the popular Red Cheddar Flake, Roasted Garlic No-knead is not the kind of bread you slather with peanut butter for a wholesome breakfast on Monday morning. It is, however, the perfect thing to bring to a spaghetti dinner at a friend's house on Friday night. And since each loaf contains an entire bulb of garlic, we suggest you plan your schedule accordingly. Don't consume several pieces of this the night before a job interview, that is -- unless of course you're applying for a position with the California Garlic Council. If that's the case, then maybe the whole loaf is in order. For the recipe, see below.

  • 454g (1 lb) bread flour
  • 340g (12oz) water
  • 1/4 tsp instant yeast
  • 11g (1.5tsp) salt
  • 1 bulb garlic, par-baked, peeled, chopped (incorporate w/dry ingredients)
Tips & Tricks

  • To learn the no-knead method, please click here.
  • The best way to prepare garlic for this recipe is to par-bake it for 10 minutes at 425F. This will soften the garlic just slightly, making it a breeze to peel away the otherwise stubborn skins. Partially baking the garlic also releases aroma, which adds flavor to the dough as it rises overnight.
  • Directions for bar-baking garlic: Preheat oven to 425. Break the bulb into individual cloves and arrange them on a baking sheet so that all are lying flat (not piled on one another). Bake for ten minutes until garlic is soft to the touch. Peel and chop when cool.
  • I like to chop my garlic in all different sizes -- smaller pieces encourage uniform flavor, larger pieces seem to give texture to the finished bread. You can also smash a few cloves with the edge of your knife, making a paste which can be mixed into the dough with pleasing effect.
  • Penzeys freeze-dried garlic is one good alternative to roasting your own. It has great taste with little hassle (if you consider roasting garlic a hassle). Depending on your love of garlic, one or two tablespoons will probably suffice. Just experiment.
  • Vampires beware!

    Wednesday, May 18, 2011

    Recipe: Red Cheddar Flake (No-knead)

    By Chris Siciliano

    Several people have asked for a no-knead alternative to the cheddar jalapeno sourdough recipe. What follows is that alternative, albeit with a twist. Instead of fresh jalapenos, this recipe calls for two teaspoons of dried red pepper flakes. The reason: variety and convenience. On one hand, I really like the taste of red pepper flakes, sometimes more than jalapenos. On the other hand, red pepper flakes are a cinch to use. No dicing, chopping, or slicing means no risk of scorched eyeballs from an errant shot of pepper juice. Crisp jalapenos, they get me every time.

    At the start of this experiment, I didn't know how well red pepper flakes would perform as a substitute. I now believe that nothing, not even jalapenos, could work better. The delayed heat of red pepper allows the cheddar cheese to shine for just a moment. Then POW! a nice clean burn cuts through the richness of the cheese, lingers for several minutes and then begins to fade. The fact I used a smoked cheddar didn't hurt matters any; the smoke provides a welcome, natural transition from the cheese to heat, a good way to tie the whole thing together.

    This recipe is one I foresee returning to often, more so than even the jalapeno-based original -- that's how happy I am with it. I wonder too how many different kinds of dried chilis I can find in the international grocers around town. Could this be the start of something beautiful? My hope is that it is.

    Recipe

    • 454g bread flour (1 lb)
    • 340g water (12oz)
    • 9-10g salt (1.5 tsps)
    • 1g Saf-instant yeast (1/4 tsp)
    • 5g red pepper flake (2 tsp)
    • 80-100g smoked cheddar cheese (3-4 oz)
    Tips & Notes

    • To learn the no-knead method, please click here.
    • Incorporating two teaspons (5g) of red pepper flakes produces quite a kick. If you're a fan of say, mild salsa, you might want to back-off slightly or even considerably on the amount of red pepper you incorparate. One teaspoon or less should still give you some good flavor. No pepper at all will give you mere cheese bread, which, on its own, is still better than most anything else on earth.
    • Mix in the pepper flakes and cheese with the other dry ingredients (salt, flour, yeast). Add water when all ingredients are uniformly dispersed.
    • For this recipe, err on the side of less salt. The salt already in the cheese will make up for any you don't put in.
    • Bread with cheese (fat/oil) tends to brown sooner and burn faster than breads without. Ovens will vary, but if you're prone to bottom scorching (and let's be honest, who isn't?), try turning the heat down to 475 or even 450.
    • Still rather have fresh jalapenos? No problem. Simply substitute the red pepper flakes with two good-sized jalapenos, diced. I hear the peppers with the white lines are hotter than the rest, though I can't verify that myself.
    • Breadheads unite!
    Smoked cheddar cubes

    Just mixed

    Pre-shape

    Fin!

    Thursday, May 5, 2011

    Homemade Whole Wheat Tortillas Recipe

    By Chris Siciliano

    The following recipe makes eight 6-inch whole wheat tortillas. Finished tortillas are chewy, with a pleasant mouth-feel and pronounced wheat taste.

    These are great for everything—from slow-roasted pork shoulder to black beans and homemade salsa. Once cool, tortillas will stay good for a couple of days in a plastic bag or container, though it's always best to warm them up again before eating. From start to finish, the recipes takes about an hour to complete.

      • 125g natural white flour (about 1 cup)
      • 125g (about 1 cup) fresh-milled hard red winter wheat, or regular wheat flour
      • 150g water (5–6oz)
      • 25g olive oil  (2 Tblsp)
      • 3-5 grams salt (1/2 tsp)
      • 1 tsp baking powder

    Directions for Homemade Tortillas

    Mix ingredients together into shaggy mass, knead briefly (about a minute or two) until the mass forms a ball. Let sit for about 10 minutes, knead briefly again, until the dough is smooth and satiny. Cut into 8 eight equal pieces (about 50g each). Shape into balls. Rest for 10–20 minutes. Roll tortillas out to desired thickness, thinner is better. Use extra flour to keep the dough from sticking. Place raw tortilla on a hot skillet (cast iron works best). Cook on one side until bubbles form (30-45 seconds); turn over; cook until done (20-30 seconds). Place finished tortilla in a towel until all tortillas are finished. Serve warm.

    Notes/Tips 

    • For a more subdued wheat taste and increased chewiness, substitute 1/2 cup (50-65g) of the whole wheat flour with regular white flour.
    • Also, feel free to substitute the hard red winter wheat with other grains/flours available at Siciliano's. I've had success making this same recipe with spelt, rye, hard spring wheat (both red & white), 6-grain flour, and of course plain old white flour.
    • When time allows for a short fermentation, I substitute the baking powder with 2g (1/2 tsp) instant yeast. I don't know if it makes much difference flavor-wise, but the texture seems better.
    • Heat your skillet over medium-high to high heat; make sure the skillet is clean or else you'll be setting off the smoke alarms.
    • Too long on the skillet leads to a less pliable tortilla. It will still taste good, but won't keep for as long or as have the same pleasant chewiness. This is to say, keep an eye on your tortillas—they cook quick!
    • If you accidentally cook your tortillas too long, or you simply want to experiment, you can slice them into wedges (like a pizza), bake in the oven until crisp, and serve them with salsa like nacho chips.
    Questions or suggestions? Let us know. We're always looking to improve our recipes. For more pictures, see below.

    Dough ball

    Dough bits

    Junior dough balls (under bowl to escape drafts)

    Rolled flat, ready for the skillet

      Monday, April 25, 2011

      Recipe: No-knead spelt (50%)

      By Chris Siciliano

      Of the several interesting types of bread grain Siciliano's now carries, the one that currently excites me most is our organic spelt. Thanks to its relative friendliness to people sensitive (not intolerant) to gluten, this 8,000-year-old precursor to modern wheat is today a common alternative to regular white flour. However, deserving of more than just the "alternative" label, spelt can be a worthwhile, tasty addition to your regular cache of every-day ingredients.

      Whoever spelt it, dealt it.

      In Bread: A Baker's Book of Techniques and Recipes, Jeffrey Hamelman (who is to baking what John Palmer is to brewing) has this to say about spelt:
      It has attributes similar to regular wheat in bread baking, such as a high protein level and sufficient gluten to produce breads with reasonable volume. It is nutritionally similar if not superior to wheat. Another important benefit of spelt is that it can be tolerated by people with certain wheat allergies.
      Aside from the health benefits, we're finding that bread made from spelt has excellent flavor, a little nuttier maybe, a little sweeter than traditional all-wheat bread. The recipe below--equal parts fresh-milled spelt and natural white flour--produces both a crumb and texture comparable to that of similar all-wheat formulas. This is a hearty, healthy, feel-good-about-yourself kind of bread, good for toast and sandwiches of all kinds. (Please see this post here for a discussion and directions on using the no-knead method of bread baking.)

      Formula

      • 227 grams (8oz) "natural premium" white flour (or any good, non-bleached white flour)
      • 227 grams (8oz) fresh-milled organic spelt berries (grind medium-fine to course; you should see bran flecks in the flour, and the flour should feel slightly gritty)
      • 312 grams (11oz) water
      • 10 grams (1.5 tsp) salt
      • 1 gram (1/4 tsp) Saf-instant yeast
      Notes & Tips

      • Several sources suggest cutting back on water when using spelt flour. Hence the recipe above calls for only 11 ounces of H20 and not the usual 12. Apparently spelt hydrates faster and more thoroughly than regular wheat flour. Though I don't yet have enough experience with spelt to verify this, I can attest to the quality of dough this particularly recipe makes, regardless of the difference in overall hydration.
      • If you've got designs on baking this recipe for a gluten-sensitive loved one, keep in mind that using one-half pound of wheat flour will likely negate the gluten-friendly benefits spelt otherwise has to offer.
      • The last time I made this recipe, I doubled it and used half the dough to make pitas. This was a good decision. Pitas made from this recipe are chewy and incredibly flavorful, as perfect a compliment to sauteed onions, peppers, mushrooms, and feta (for dinner) as they are to peanut butter and bananas (breakfast). Recipe coming soon!
      As always, if you have have tips, comments, questions, or concerns, please send them our way. Happy baking (and eating) everyone!

      Spelt close-up

      Thursday, April 7, 2011

      Recipe: No-knead bread with hard red winter wheat

      Friends, colleagues, foodies, enthusiasts, and craft-anything obsessives:

      Our apologies if it seems bread- & baking-focused posts have lately taken hostage of the Buzz. We're excited to share our new products, is all, and when we get excited about something, we have a tendency to obsess. (Can you blame us?)

      At any rate, today we have for you a recipe, a very simple one, but one also guaranteed to produce some of the most extraordinary bread you've ever seen or tasted. It's a rustic bread, close to but not quite ciabatta, and includes a small percentage of fresh-milled whole wheat to give it a somewhat heartier taste and aroma. Give it a chance and we think that you too, like us, will be hooked.

      First things first, this recipe is based on the famous no-knead method of baking, discussed at length in a previous Buzz post found here. No time for reading? Then this video here will be enough to get you started, though we still recommend you read the longer post if/when time allows -- there are tips and additional videos included that make the already easy process even easier. On to the recipe...

      All non-water ingredients are now for sale at Siciliano's.

      • 12-oz (340g) natural premium white flour
      • 4 oz. (115g) fresh-milled hard red winter wheat
      • 12 oz (340g) Water
      • 2 teaspoons (10-11g) purified sea salt
      • 1/4 teaspoon (1g) Saf-Instant yeast

      For directions, again, please refer to the No-knead Buzz post here or to this helpful video here. For an even wheatier experience, try increasing the amount of fresh-milled hard red wheat flour from 4 oz to 5 or even 6 oz. Just be sure to decrease the amount of white flour accordingly. And a final note, when you mill down the wheat berries, do yourself a favor and smell the fresh-ground flour -- you'll be shocked by the pungent, almost fruity aromas that are completely absent from any pre-ground.

      More recipes to follow!

      Wednesday, April 6, 2011

      The mill at Siciliano's - now open for business!

      Today we're pleased to announce that Siciliano's flour mill is officially open for business...with a few caveats. The mill's current home (next to the honey pot) is a temporary one; once we finish construction on the new wing we will move milling operations to their permanent location, about 30 feet to the west.

      Also, since our fancy new bins have yet to arrive, we've temporarily stored all grain and flour in regular old brew pails. Not the prettiest display, but for the time being, they get the job done.

      Why the rush? After staring for a week at a pile of 25- and 50-lb bags of pure potential (i.e. wheat berries, rye berries, etc), we figured, hey, why not get this stuff out of the warehouse and onto the floor so people can start experimenting with it. That's what I've been doing. Even as I write I'm thoroughly enveloped by the aroma of fresh-baked bread wafting in from the kitchen -- why should I have all the fun?

      Find  photos from bake-day at the end of this post. First, here's a list of product now for sale at Siciliano's, with prices included.

      • Organic flax seeds - $1.79/lb
      • Organic sesame seeds - $4.69/lb
      • Caraway seeds - $3.49/lb
      • Organic 7-grain cereal - $1.99/lb (soak overnight, add to bread, contributes wonderful flavor, texture, and nutrition)
      • Organic steel-cut oats - $1.69/lb (soak & add to bread, or use to make "real" oatmeal - you'll never go back to instant!)
      • Organic brown basmati rice - $1.99/lb
      • Organic rye berries - $0.79/lb
      • Organic spelt berries - $1.99/lb
      • Organic wheat berries, "Bronze Chief" - $1.09/lb (hard red spring wheat, great for bread)
      • Organic wheat berries, "Prairie Gold" - $1.09/lb (hard white spring wheat, great for bread, lighter in color than the red)
      • Wheat berries, hard red winter - $0.89/lb (intense wheat aroma & flavor)
      • Organic soft white heat berries - $0.99/lb (grind fine, use for pastries, cakes, and cookies)
      • Organic wheat bran - $0.79/lb
      • Organic 6-grain flour - $1.39/lb (wheat, rye, barley, corn, millet, buckwheat)
      • Purified, free range, cage-free sea salt - $0.79/lb
      • Organic cane juice sugar crystals - $2.19/lb
      • Wheat Montana natural premium white flour - $0.99/lb (unbleached, unbromated, great for bread and pizza)
      • "Prairie Gold" whole wheat flour - $1.09/lb
      • Saf-instant yeast - $0.39/oz or 5.29/lb
      • Natural parchment paper - $4.89

      Please note that this list is only a beginning -- if you would really, really, really like to see us carry something not posted here, come make your case in person. We're apt to be convinced.

      Happy baking everyone!


      Loyal customer Brad Emerson showing off his first flour purchase, our first flour sale


      Temporary bulk bins


      Have a slice or four


      Bake-day: results


      Sourdough: 60% fresh-milled flour, 40% natural premium white

      Thursday, March 31, 2011

      Photo essay, road trip to SW Michigan

      By Chris Siciliano

      For weeks now this editor has done little else but carry on about Siciliano's forthcoming grain & flour department. Until recently I haven't had much in the way of tangible news to report. That all changed last Friday when the new flour mill arrived. Today I'm happy to relay even more good news -- we currently have sitting in the warehouse (though not yet for sale) several hundred pounds of whole grains, seeds, salt, sugar and flours.

      The product arrived in-store Tuesday evening, not by UPS or FedEx delivery, but thanks instead to an intrepid crew of Siciliano associates who sacrificed their afternoon to secure the goods in person from a distributor in Southwest Michigan. And when I write "sacrificed the afternoon", I mean of course "barhopped all the way home". What can we say? At Siciliano's, even a bag of flour is just cause for celebration.

      For photo highlights from the trip, please keep reading.

      First stop: The Pullman Tavern (Pullman, MI). Here the fearless crew sampled this year's Oberon under the watchful gaze of (1) an actual Tyrannosaurus Rex; and (2) a misty temptress from times long-past.


      Next time you're in Pullman, it's worth stopping in


      An actual T-Rex eating an actual human hand


      Oberon - the first sign of Spring...still waiting on Spring


      Authentically Kraeusened - says so right on the label


      The patriarch


      The legendary temptress of Pullman


      Second stop: Clementines (South Haven, MI). Wherein the crew enjoyed a mystery porter, admired a intricately-carved wooden eagle, sampled a previously unknown (to them) Michigan cider.


      The intrepid crew


      A pleasant discovery


      Every bar should have one


      Cheetah in the mirror


      Mystery porter


      So awesome it deserves a second look


      Third Stop: The Thirsty Perch (South Haven, MI). Wherein the crew dined on many delectable fishes, and chicken wings.


      Not to be confused with the Parched Perch, which is
      a completely different restaurant


      Circle of life, little perch, circle of life


      Fourth stop: Saugatuck Brewing Co. (Saugatuck, MI). The crew was impressed by the quality of beer -- it's a brewery definitely worth the visit.


      Great place for a pint


      On-premise brewing


      Brew kettles and such


      Fifth & final stop: Siciliano's Market warehouse. Special thanks to the bossman Steve for getting everybody home safely (he's always the responsible one).


      Product piled high in Siciliano's warehouse


      Look for Siciliano's new flour/baking department to be up and running soon!